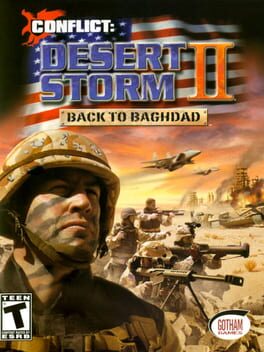
Conflict: Desert Storm is a tactical squad shooter about using a four-person SAS or Delta Force team across military missions in desert, urban, and indoor spaces. This guide focuses on first-clear habits: squad commands, role switching, stealth, stance control, medikits, explosives, armor threats, air support, and careful objective play.
Content note: rating materials list Blood and Violence. This guide keeps the war-combat framing non-graphic and focused on play.
Do not treat this like a pure run-and-gun shooter. The game is much easier to read when every soldier has a job, every approach has a fallback, and every loud action is weighed against the risk of drawing more enemies.
Essential Tips
1. Finish Training Before the Campaign
Training is not busywork here. It teaches movement, crouching, prone crawling, weapons, vehicles, off-map support, medikits, and squad commands. That matters because campaign missions often ask you to switch between solo movement, team positioning, explosives, long shots, and support tools without much room for fumbling.
Spend enough time in training that you can crouch, go prone, change soldiers, issue follow or hold orders, and interact with prompts without looking them up. A few minutes of practice will save far more time than restarting a mission because the squad ignored cover or a specialist was stuck in the wrong place.
2. Use Each Specialist for the Right Job
Your squad is built around roles. The team leader is the flexible rifleman, the sniper handles distant soldiers and turret crews, the heavy weapons specialist answers armor and machine-gun work, and the combat engineer is your explosives expert.
Switch soldiers deliberately. If a tower guard is pinning you down, bring in the sniper. If a tank blocks the route, stop asking rifle fire to solve it. If an objective needs C4, protect the engineer before the planting animation starts. Good role use makes the squad feel much stronger than simply moving four bodies down the same road.
3. Issue Hold and Follow Orders Often
The squad keeps following orders when you change soldiers, so use that behavior. Hold the team behind cover while one specialist scouts. Bring everyone forward only after the first threat is handled. If the path is exposed, place soldiers where they can cover an angle instead of letting them wander into open ground.
Follow is useful after a fight, but hold is safer before one. The game rewards moving in short steps: hold, scout, clear, regroup, then move again. That rhythm also stops the whole team from triggering alarms, blocking doorways, or crowding around explosives.
4. Improve Accuracy With Positioning
Accuracy is not only about the weapon. Stationary fire is better than firing while moving, and crouching or lying prone improves control further. When you spot enemies at medium range, stop sprinting, settle into a stable stance, and fire in short bursts.
Automatic fire can pin enemies down, but long sprays waste ammunition and lose precision. Tap controlled bursts, especially when ammunition is limited. If a firefight feels chaotic, back up to cover, crouch, and let the squad answer from a better angle.
5. Let Stealth Thin the First Layer
Many missions become easier if the first guards go down quietly. Use prone movement, corners, silenced weapons, the knife, and patient observation before opening up with the full squad. A stealthy start can remove patrols, turret operators, or isolated sentries before they alert the wider area.
Stealth does not mean crawling through every mission forever. It means delaying the loud phase until the team is ready. If you must break quiet, make the first loud action count: destroy a key vehicle, remove a turret, or clear the position that would punish your squad during the retreat.
6. Protect the Combat Engineer During C4 Work
C4 is powerful against fixed objectives and stationary targets, but planting it leaves the engineer exposed for a moment. Before placing charges, clear nearby guards, set the rest of the squad to cover likely approaches, and plan where the engineer will move after planting.
Multiple charges can be placed and detonated in order. Use that to solve objectives efficiently, but keep distance from the blast area. Grenades or nearby explosions can also set off planted charges early, so do not turn a careful demolition plan into an accidental squad wipe.
7. Treat Anti-Tank Weapons as Limited Answers
Anti-tank weapons are precious, and armor is not a target for casual frontal attacks. When possible, flank armored vehicles and aim for weaker rear armor. If terrain gives you a side route, use it before spending rockets from a bad angle.
Keep the heavy weapons specialist ready, but do not leave him exposed while lining up the shot. Have the rest of the squad suppress infantry, then take the armor shot from cover. If infantry and armor appear together, clear enough foot soldiers to stop them from interrupting the anti-tank setup.
8. Use Smoke, Medikits, and Ammunition Pickups
Smoke grenades do not win the fight by themselves, but they can cover an advance or a retreat. Use them when crossing an exposed lane, reaching a downed teammate, or shifting the squad away from a bad angle.
Medikits are vital because unconscious soldiers can be brought back into the mission. Do not leave a downed specialist behind unless the area is still too dangerous to enter. If ammunition gets low, search captured positions for replacement weapons or ammo before pushing into the next objective zone.
9. Use Air Support and Vehicles With a Plan
The game includes air strikes, artillery, and vehicles, but these are not panic buttons. Air strikes require you to designate a target and wait for a proper lock, so clear enough space to aim. Vehicles help movement and firepower, but they can also make you louder and more exposed.
Before using support, ask what problem it solves. A strike is best for a hard target or defended area. A vehicle is best when it moves the squad safely through a space or gives firepower the team cannot carry. If the tool does not solve the current obstacle, save it.
10. Read Briefings and Maps Before Moving
Mission briefings and maps tell you what matters before the shooting starts. Check objectives, likely route shapes, and whether the mission sounds like rescue, demolition, infiltration, or direct assault. The first minute of planning prevents the common mistake of clearing the wrong side of a map while the real objective waits elsewhere.
When you find a new objective item or target, pause mentally and rebuild the plan. Do you need the engineer? Is stealth still useful? Should the squad hold while the sniper removes tower guards? Missions are more manageable when every objective changes your formation, not just your waypoint.
11. Avoid Civilian and Alarm Trouble
Some areas include noncombatants or alarm-sensitive setups. Move slowly, identify who is actually threatening the squad, and avoid sloppy fire into crowded spaces. If alarms are possible, assume that one bad shot or careless advance can bring extra pressure.
When an alarm does happen, do not sprint blindly forward. Pull back to cover, face the direction reinforcements are likely to use, and let controlled fire stabilize the fight. A failed stealth attempt can still become a clean clear if you stop the squad from scattering.
12. Pick Difficulty for Your Patience Level
The campaign offers Easy, Medium, and Hard. A first run is about learning command flow, stances, mission pacing, and specialist timing. If you are new to older squad shooters, starting lower can make the controls and mission logic easier to absorb.
Hard is better once you already understand the tools. It can make medals and survival more meaningful, but it also punishes messy squad movement. Learn the role system first; then replay for cleaner routes, better squad survival, and harder difficulty goals.
Common Mistakes to Avoid
-
Do not skip training - The campaign expects you to command, switch, crouch, crawl, drive, heal, and call support under pressure.
-
Do not move the full squad into every corner - Hold the team back while one specialist scouts or solves a narrow problem.
-
Do not use the wrong soldier for specialist work - Snipers, engineers, and heavy weapons exist because rifles cannot solve everything cleanly.
-
Do not fire while moving when you can set your stance - Stop, crouch, or go prone before taking important shots.
-
Do not spray automatic fire until the magazine is empty - Short bursts are more accurate and conserve ammunition.
-
Do not plant C4 without cover - The engineer is vulnerable while placing charges.
-
Do not attack armor head-on by habit - Flank vehicles and protect the anti-tank soldier.
-
Do not ignore unconscious teammates - A medikit can keep a needed specialist in the mission.
-
Do not waste smoke grenades in safe areas - Save them for exposed movement, rescues, and retreats.
-
Do not rush after an alarm - Fall back, cover angles, and regain control before advancing.
Summary
| Category | Top Tip |
|---|---|
| Training | Learn commands and stances before the campaign |
| Squad Roles | Give each specialist the job built for them |
| Commands | Use hold before danger and follow after clearing |
| Accuracy | Fire from a stable crouched or prone position |
| Stealth | Quietly remove the first threats before going loud |
| C4 | Cover the engineer and plan the escape path |
| Armor | Flank vehicles and save anti-tank shots |
| Recovery | Use medikits and captured supplies to extend missions |
| Support | Call strikes or use vehicles for specific problems |
| Difficulty | Learn the squad flow before chasing Hard clears |
Did this answer your question?
Your feedback helps keep the useful answers visible.Sources
4 checked for this guideEvery factual claim in this guide was checked against at least two independent sources before publication. These are the references used for Conflict: Desert Storm.
Next answers


Community notes0
No community notes yet.
Sign in to contribute