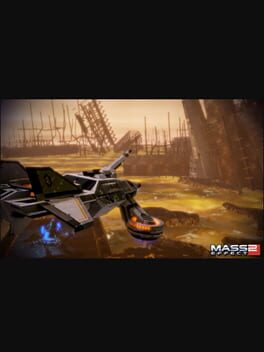
Mass Effect 2: Lair of the Shadow Broker is BioWare’s Mass Effect 2 DLC built around Liara T’Soni, Illium, the Shadow Broker’s lair, and the post-mission intel center. It is not a standalone game; how you access it depends on whether you are playing the original release, Mass Effect 2 (2010 Edition), or Mass Effect Legendary Edition.
Content warning: Mass Effect 2 is rated Mature 17+ for blood, drug reference, sexual content, strong language, and violence. This guide stays non-graphic and focuses on player actions.
Use this as a spoiler-light planning guide. It avoids exact boss scripting, romance variants, achievement routes, and outcome claims against current original and Legendary Edition builds.
Essential Tips
1. Confirm Which Version You Are Playing
Original DLC, Steam 2010 Edition, and Legendary Edition do not present the same store path.
The original add-on was a separate Mass Effect 2 DLC purchase on PC and Xbox 360, with the PlayStation 3 version carrying it differently. Store and bundle behavior now varies by platform: Xbox may still present it as a game-required add-on, Steam’s Mass Effect 2 (2010 Edition) bundles previously released DLC, EA’s old PC DLC Bundle page is unavailable for purchase, and Legendary Edition includes broad single-player DLC content.
2. Treat It as DLC, Not a Side Planet
The cab route starts a committed mission chain.
The start path is Normandy mail, Illium, Liara, then the “Let’s get the Shadow Broker” conversation option. Save before you take the cab to Liara’s apartment, because the mission continues through to its ending without a normal Normandy or Galaxy Map break.
3. Consider Story Timing Before You Launch It
The DLC can be played during Mass Effect 2, but its dialogue has a late-game lean.
The DLC can be played before or after the suicide mission, but some dialogue is weighted toward a completed suicide mission. If continuity matters to you, make a manual save and choose timing deliberately rather than clicking the prompt as soon as it appears.
4. Bring a Flexible Combat Setup
Expect barriers, drones, heavies, and mixed enemy waves.
Do not enter with a loadout that only solves one defense type. Bring squad powers and weapons that can answer barriers or shields, armored/heavy targets, mechs, and combat drones. On higher difficulties, control and stripping powers matter more than raw weapon comfort.
5. Search Rooms Before Moving On
The route has terminals, medigel, credits, and research pickups.
Because the mission locks you into a long chain, treat each apartment, office, and ship section as a one-pass sweep. Check side rooms, upper levels, terminals, medical stations, and obvious interactables before opening the next door.
6. Use Cover Conservatively in the Office Fights
Several fights trigger more enemies as you advance.
Move up only after thinning a group. Engineers can add drones, some enemies throw flashbangs, and vanguard-style enemies can punish sloppy positioning. If a room opens wide, start from stable cover and let the next wave reveal itself before sprinting forward.
7. Pay Attention to Environmental Controls
The ship route is not only hallway shooting.
Lightning spires, rod controls, panel controls, fire suppression, and hatch objectives all matter. When the route points you toward machinery or controls, clear nearby pressure first, then interact before hunting for a non-existent alternate path.
8. Expect a Long Finish
Do not start the DLC when you only have time for one quick assignment.
The mission is more substantial than a normal assignment and includes investigation, combat, vehicle-route pacing, ship traversal, and a finale. Start with enough real time to finish a full DLC session or at least reach clean save points.
9. Return to the Intel Center Afterward
The Shadow Broker Base is part of the reward loop.
After the story route, use the base’s research terminal, dossiers, investment opportunities, survey information, armor locker, ship model, and other terminals. The DLC’s value is not only the mission; the post-mission hub can help with upgrades, resources, and flavor material.
10. Do Not Use This Guide for Romance or Ending Planning
Relationship context matters, but exact variants need their own route.
The DLC can affect Liara relationship context, and dialogue may vary with timing or imported state. Exact romance scenes, imported relationship state, Mass Effect 3 effects, and outcome variants belong in a dedicated outcomes guide.
Version and Store Behavior
| Version / Store | Practical Guidance |
|---|---|
| Original Xbox listing | Current Xbox page shows Lair of the Shadow Broker as paid DLC, requiring Mass Effect 2, playable with Xbox One and Xbox Series X |
| Original PC EA bundle | EA’s Mass Effect 2 DLC Bundle page lists Lair in the bundle but showed unavailable for purchase when checked |
| Steam Mass Effect 2 (2010 Edition) | Steam lists all previously released DLC as included, including Lair, with EA app/account and Steam account linking requirements |
| PlayStation 3 | Lair is included on the PS3 disc version; current digital behavior can vary |
| Legendary Edition | EA says the package includes single-player base content and over 40 DLC; wiki specifically names Lair as included |
| Region/account behavior | Check your storefront and account before relying on legacy DLC access |
DLC Flow
This is the broad mission flow, not a full walkthrough:
- Normandy mail: Read the message that points Shepard toward information useful to Liara.
- Illium and Liara: Travel to Illium and speak with Liara to start the Shadow Broker route.
- Cab to apartment: Use the cab route when ready; this is the point to treat as committed.
- Apartment investigation: Inspect clues and follow the DLC’s opening trail.
- Illium combat route: Expect office firefights, mixed Shadow Broker forces, and environmental blockers.
- Chase and ship approach: The DLC shifts pace before moving into the lair route.
- Shadow Broker ship: Use cover, controls, lightning spires, and objective interactions to move through the exterior/interior route.
- Final stretch: Keep saves and resources in mind; exact finale mechanics belong in a dedicated walkthrough.
- Intel center cleanup: Return to terminals, research, survey information, investments, dossiers, and collectibles after the mission.
Combat and Route Tips
- Prepare for barriers and shields: Bring at least one reliable way to strip defenses before relying on health damage.
- Plan for drones: Engineers can add drone pressure, so be ready to retarget or fall back instead of tunneling on one enemy.
- Respect heavies and vanguards: Do not let aggressive enemies push you out of cover while you are fighting basic agents.
- Advance slowly in offices: Several spaces become dangerous when you move too far before clearing the current wave.
- Use squad placement: Put squadmates where they can fire safely instead of letting them stand in open office angles.
- Grab medigel before doors: Medical stations matter more when the mission chain prevents normal Normandy resets.
- Read the room for controls: Fire, blocked panels, rods, hatches, and spires are route language, not background detail.
- Save before major transitions: Use manual saves before the cab, after difficult fights, and before obvious route changes.
Resource Management
| Resource | How to Handle It |
|---|---|
| Manual saves | Keep one before launching the DLC and rotate saves during the route |
| Medigel | Pick it up whenever a station appears; long sections make wasteful healing costly |
| Heavy ammo and power cells | Save burst damage for heavies, mechs, and high-pressure waves |
| Squad powers | Bring tools for barriers/shields, armor, drones, and crowd pressure |
| Credits and terminals | Sweep side rooms and interactables before moving to the next objective |
| Research upgrades | Check route terminals and revisit the post-mission research terminal |
| Survey information | Use the Shadow Broker Base terminal if you still need resource-rich planets marked |
| Investments | Treat investment opportunities as optional credit-risk flavor until exact reward behavior is clear |
Common Mistakes to Avoid
-
Do not buy or install blindly without checking your edition - Original DLC, Steam 2010 Edition, EA app behavior, Xbox entitlement, PS3 packaging, and Legendary Edition are different paths.
-
Do not take the cab before saving - Once the apartment route begins, the mission is a long chain without a normal Normandy break.
-
Do not start when your squad setup is stale - Recheck weapons, powers, armor, and bonus power choices first.
-
Do not rush through apartment and office rooms - Clues, terminals, resources, and pickups can sit off the main path.
-
Do not overextend in office fights - Advancing too early can trigger or expose more pressure before you have control.
-
Do not ignore drones and flashbang pressure - Small disruptions can push Shepard or squadmates out of safe cover.
-
Do not treat environmental controls as optional - Fire suppression, rods, panels, and hatches are part of route progression.
-
Do not skip the Shadow Broker Base after the story - The intel center, research terminal, dossiers, survey information, and investments are part of the DLC payoff.
-
Do not rely on this guide for romance or import outcomes - Save first and wait for a dedicated outcomes guide if those variants matter.
Summary
| Category | Top Tip |
|---|---|
| Scope | This is Mass Effect 2 DLC, not a standalone game |
| Version | Check original, Steam 2010 Edition, and Legendary Edition access separately |
| Start | Read Normandy mail, go to Illium, talk to Liara, and save before the cab |
| Timing | Consider waiting if you care about late-game dialogue continuity |
| Combat | Bring answers for barriers/shields, heavies, drones, and mixed waves |
| Exploration | Sweep rooms for terminals, medigel, credits, and research |
| Route | Watch for environmental controls and long-chain mission flow |
| Reward | Return to the Shadow Broker intel center after completion |
Did this answer your question?
Your feedback helps keep the useful answers visible.Sources
8 checked for this guideEvery factual claim in this guide was checked against at least two independent sources before publication. These are the references used for Mass Effect 2: Lair of the Shadow Broker.
Next answers


Community notes0
No community notes yet.
Sign in to contribute